Integrate Claude Ai to WordPress

How to Connect Claude AI to WordPress. A Complete Step-by-Step Guide

WordPress development is changing fast.

Today, you don’t always have to spend hours writing every function, debugging every PHP error, or building every component from scratch. With AI tools like Claude, WordPress developers can work faster, explore new ideas, and build more powerful custom websites.

But connecting Claude to WordPress isn’t just about adding an AI chatbot to your website.

Today we will show you how to Integrate Claude Ai to WordPress without any coding .

Step 1.

  1. Install and setup WordPress on your server.
  2. Create a free Claude Account 
  3. Install Novamira Plugin for download click here ( it’s free plugin )

Step 2.

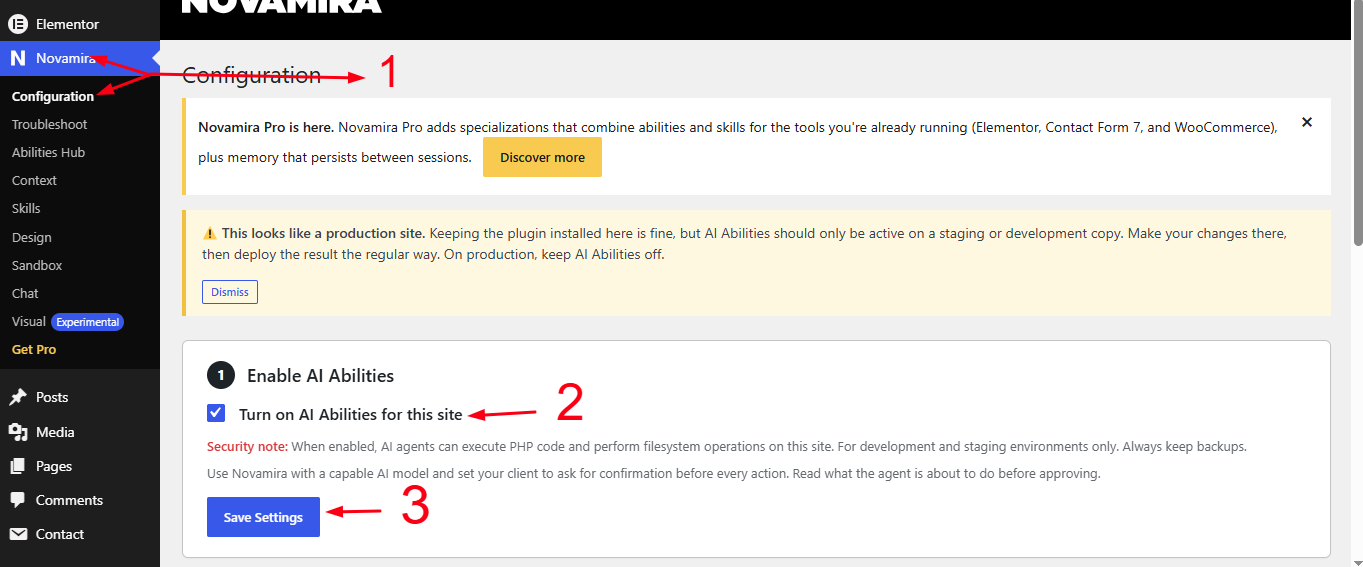
  1. Navigate WP Dashboard > Novamira> Configuration
  2. Turn on AI Abilities for this site
  3. click Save settings button 
Integrate Claude Ai to WordPress

Step 3.

  1. click Choose your authentication method ( OAuth)
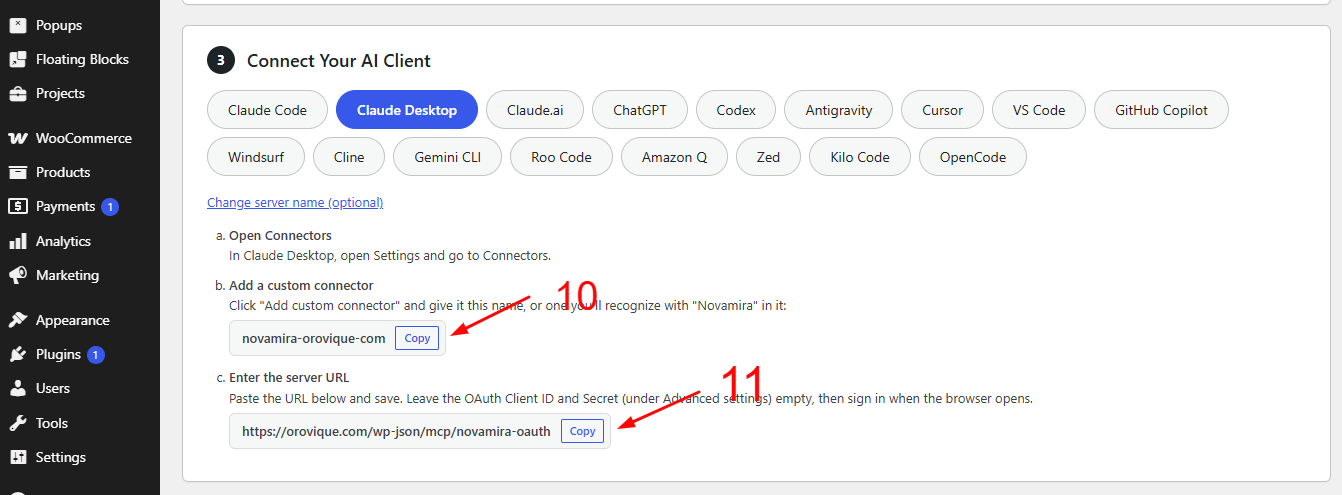
  2. select Claude Desktop
Integrate Claude Ai to WordPress

Step 4.

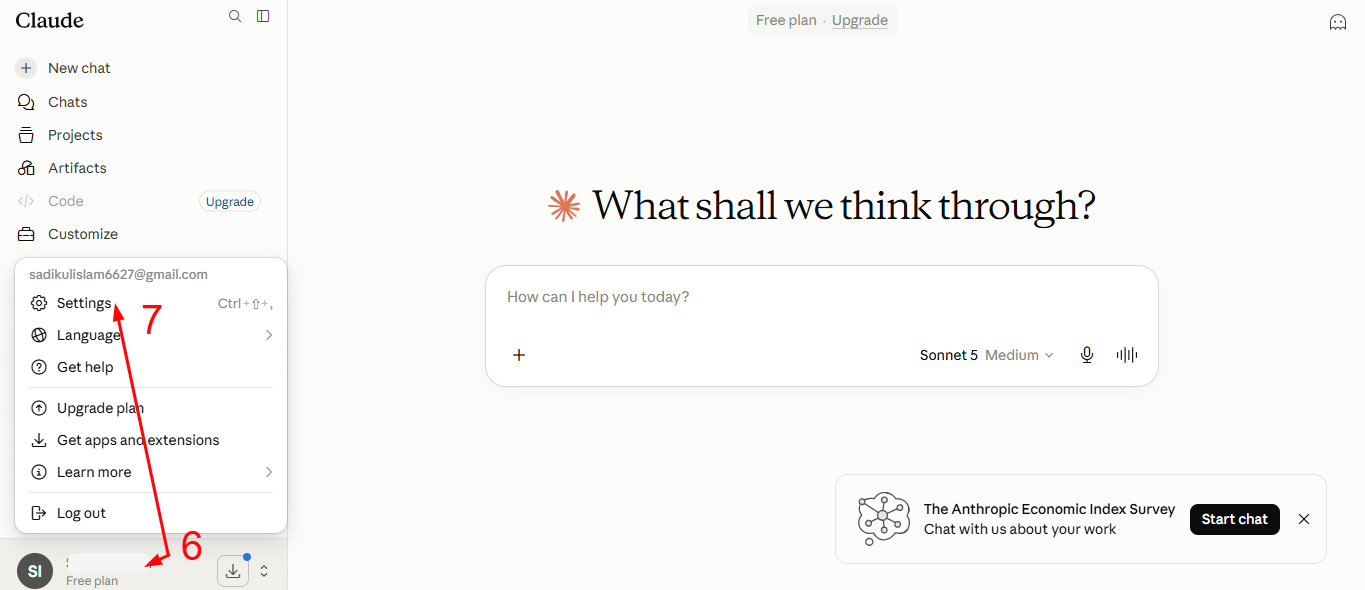
  1. Open you Claude profile 
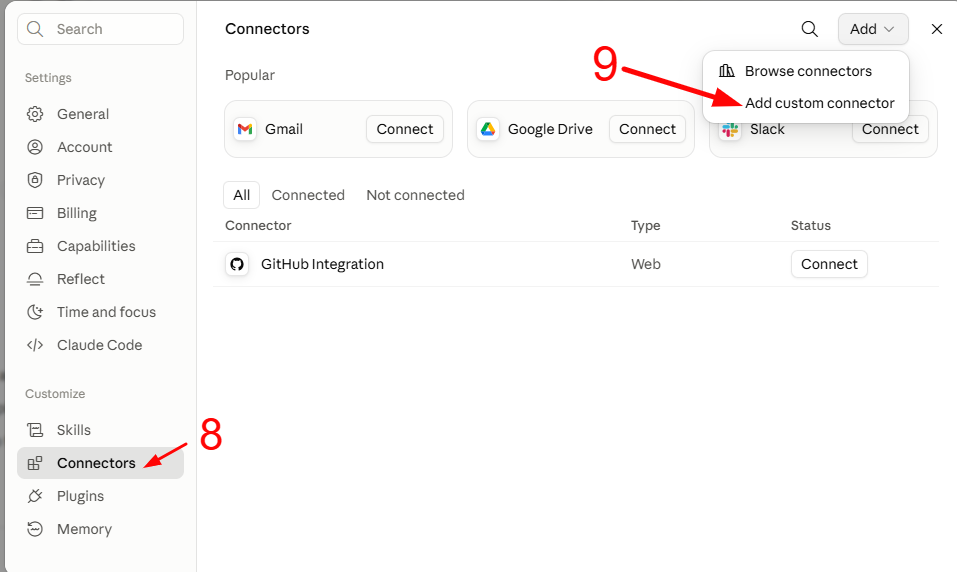
  2. Navigate settings > Connectors 
  3. Click Add > Add custom Connector 
integrate claude in wordpress
Integrate Claude Ai to WordPress

Step 5.

  1. Back on Wp Dasboard 
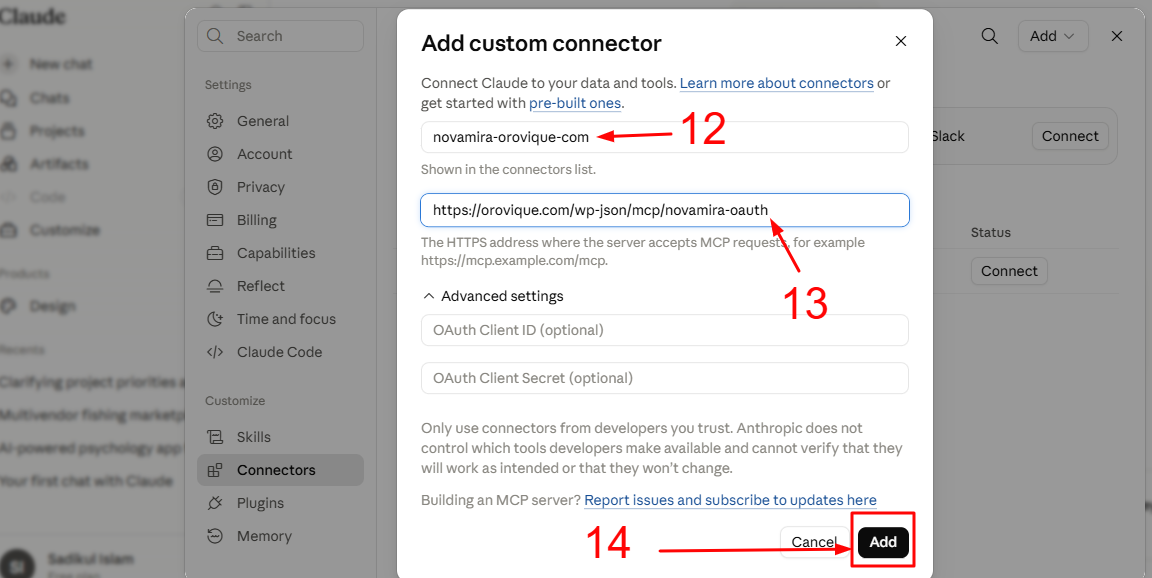
  2. Copy Add a custom connector and Paste on Name 
  3. Copy Enter the server URL and Paste on Remote MCP Server URL
  4. click Add
Integrate Claude Ai to WordPress

Step 6.

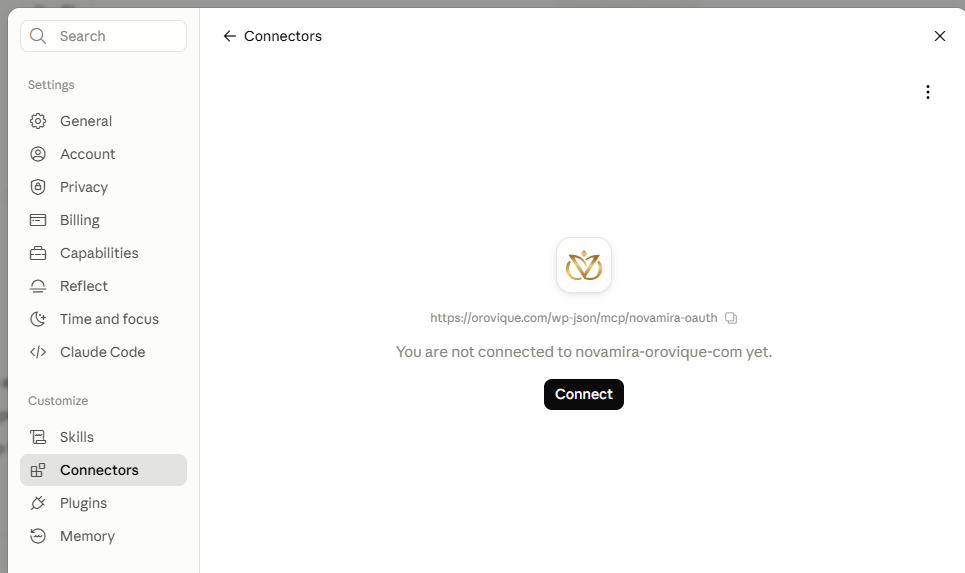
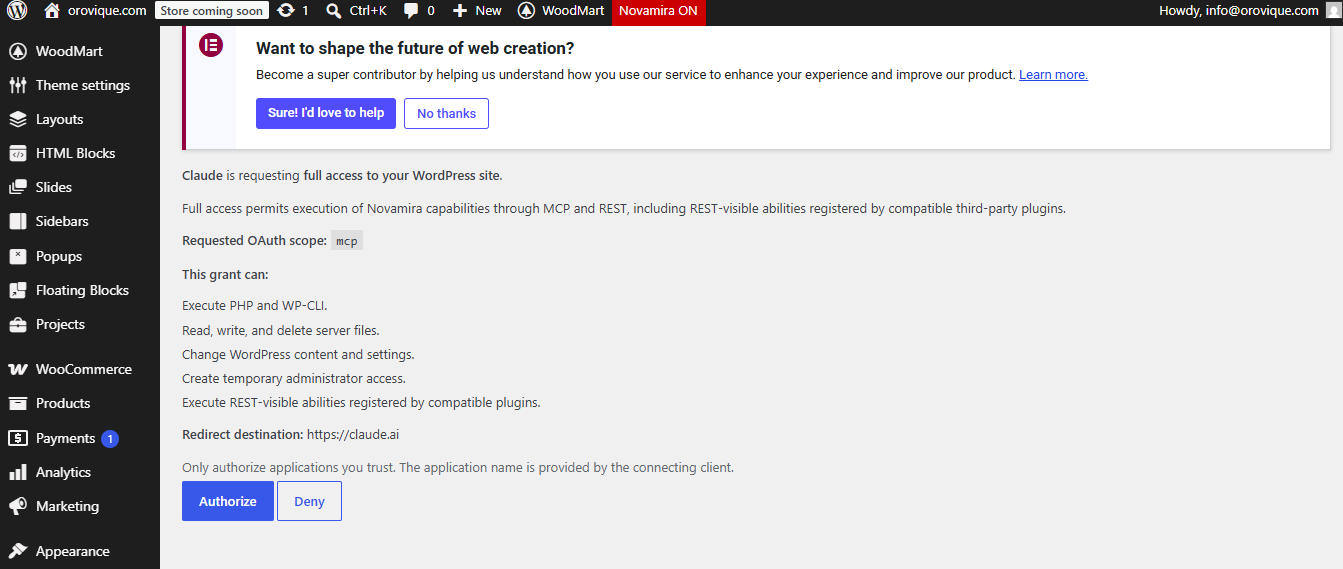
  1. Click Add
  2. After That it will redirect on WP Dashboard then click Authorize button  
Integrate Claude Ai to WordPress

BOOOOMMMM Calude AI is Now Integrated in your WordPress and Now you can build Custom WordPress theme , Plugin and dynamic Web Design . 

Request a Quote

Scroll to Top